Use coupon code: NEW25 to get 25% off your entire purchase on my Etsy site!
Sunday, July 29, 2012
Friday, July 27, 2012
Origami Owl REVIEW!
This week I have had the pleasure of learning about Origami Owl! I had heard of it before, but had never really taken the time to visit the website and see what it was all about. Kim Sweisthal contacted me about writing a review for her, and then I finally took the chance to sit down and find out what I had been missing!
If you've never explored Origami Owl, you really should check it out! You get to personally select every aspect of your locket; making it not only unique, but also very special.
The first step to creating the perfect necklace is choosing charms that tell your story. Kim gave me 3 charms... After spending A LOT of time looking through all the charms available, I decided on the three above: Two stones for my children (Ironically, the blue one is my daughter's birthstone and the pink one is my son's) and one charm for my husband/marriage (The infinity sign, because that's how long our love will last). :)
The second step to designing your one-of-a-kind piece of jewelry is choosing your locket. There are two sizes, medium and large. You can choose either silver, gold, or gold rose. You can also choose with or without stones. I choose a large silver locket without stones. For me, I wanted the attention drawn to what was inside my locket... I didn't want all that pretty, girly stuff on the outside. :)
The third step to perfecting your locket, is choosing a chain. Each locket DOES come with a ball chain. BALL CHAIN? Yeah, that kind of threw me off, too. I was thinking of something cheap and cheesy... Nope! The ball chain is beautiful! It looks very elegant, and it is not at all what I expected. I am very pleased with my chain! However, there are a variety of other chains to choose from. If you prefer a more decorative chain, or if you prefer a longer chain so that the locket hangs mid-to-low torso, you can order a different chain!
Lastly, you can add a plate and a dangle. The hand-stamped plates go in the back of the locket, behind your charms. Again, there are a variety to choose from. There's silver, gold, and gold rose so that you can match them to your locket, and there are many expressions to choose from. I chose "blessed," because my locket is representing what is dearest to me... My family... When I think about them, I feel so... BLESSED. Here are a few others you can choose: "faith," "love," "family," "mama," etc.
I haven't added a dangle yet. That brings me to another thing I love about Origami Owl: You can add on. There are many dangles to choose from, from beads to keys to anchors to feathers... and many more! I think I will be adding a dangle or two in the future! What else can you add on to your locket? More charms! I'm not sure that my husband and I are quite done having children yet... Which is exactly why I didn't already have some kind of beautiful "mother" necklace with birthstones set in it. We are trying for a third child, and then I wouldn't want to wear a necklace without all three of my children's birthstones! Well, Origami Owl saved the day! If/when we have another child, I can order another charm and easily add it to my locket. PERFECT!
Now, a little about Kim Sweisthal. I met Kim through my Facebook page, 4Hankins Crochet. She was a customer, and she was just about to launch her Origami Owl business. She's been a very sweet person to work with, and has been wonderful to communicate with. She responds to my messages almost immediately, and she answered all of my Origami Owl questions. I love that the consultants are titled "Independent Designers." You should check out Kim's Facebook page to see what she has designed! People tell her what they're looking for: maybe a specific and memorable moment in their life, a person who is near and dear to their heart, a heroic battle they've fought against cancer; and Kim captures that memory and designs the perfect locket for them to treasure. It's beautiful!
The day my locket came in the mail, I had no idea what to expect. I had looked and looked through the website, but I hadn't really seen any up-close pictures of lockets, and of course, none of them looked liked what my unique locket would look like. Needless to say, I was anxious and excited. My first surprise came when I opened the package! Kim handwrote a nice note on the top, reading "To: Kristin, From: Kim." Now, I may be a sap, but I think when someone takes the extra time to handwrite something nice, I take it personally. :) She also stuffed the box so that my locket wouldn't get all beaten up on its way.
Isn't it beautiful!? I have to admit... I had a mini photo shoot with my new locket. I don't think these pics need any words...
If you like what you've seen here, please check out Kim's Facebook page and her website.
Tuesday, June 26, 2012
Camera Buddies - {LIMITED} FREE PATTERNS
I have found a lot of joy (aka instant gratification) lately in whipping up some cute little camera buddies. They caught like wildfire on my Facebook page... I had no idea they would be so popular, but boy am I glad! They have been fun to create.
Introducing:
The owl
The dino
The octopus (that turned sideways when I posted it)
and the butterfly!
I have many more of these to make, including Elmo and Minnie-inspired, puppies, ladybugs, bears, frogs, etc.! I am so excited. It's hard to work on anything else!
I'll be releasing the pattern on my Etsy soon, but I will send out ten free copies of each one first. Please comment with your email address or email me to request your free copy. I ask that you are a follower of my blog and a follower of my Facebook to receive a free copy. They will be first come, first served. You may sell your finished products as long as you give me exclusive credit (including a link) for the pattern.
Happy crafting!
Thursday, June 7, 2012
Projects Lately
I realized recently that I rarely post any of my projects! Normally I get so many hats done, it would just be an overflow of posts. However, I feel like posting some of my recent work.
I just made this watermelon hat. I'm still working on the pattern for the rest of the sizes.
A floppy sun hat for the summer.
a couple of owls
Minnie Mouse hats... pattern here
LOTS of loafers... pattern here
I have tons of yarn sitting around, waiting to be worked into cute little outfits for my daughter. Unfortunately I'm not disciplined enough to force myself to finally do them! I did manage to get this done in a couple of days while my husband was out of town. I love patterns from Mon Petit Violon designs. I have several!
Cowboy set- The hat pattern is from The Lovely Crow. I created the boots, pattern here.
Baby girl photo props :) If you're in the JBLM area, you should check out Jennifer Magee Photography. The elf hat pattern is here!
I made the sweater set and blanket set for a friend of mine.
I have also signed up for a craft show at the end of July so whenever I get a free moment I whip up a random hat like this one.
I designed this set a month or two ago. I really need to get the pattern typed up!
I also need to write a pattern for these mary janes. ;)
I also made these 3 sets recently. The Minnie Mouse hat and all of the loafers are my patterns, listed on my Etsy. I whipped up the skirt but did not write a pattern for it.
Now, while working on my current orders and hats for my craft show, I'm also going to join in on a crochet-a-long! I first read about it at plus3 crochet, and although I am joining about 3 weeks late, I think I can catch up. I've already got the first week done, but I'm going to get a few more colors this weekend. I'll post an update on that soon. ;)
Friday, May 11, 2012
Tissue Paper Art
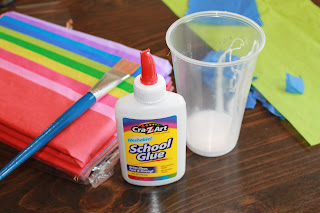
I wanted to do some Eric Carle-style art with my son so we ran to Walmart one morning for supplies. I got a huge pack of tissue paper for $3, the glue for less than $1, and the cheapest brushes I could find.
Mix a little glue with a tiny bit of water.
Choose your colors are tear the tissue paper into small pieces. I used a pencil to draw an outline on the paper, so my son would know where to put the tissue paper pieces.
Paint 1/4 of the picture with the glue mixture at a time. Press your tissue paper pieces on the glue.
Once all the tissue paper is down, paint a coat of the glue mixture over all of your tissue. Let it dry and you have your very own little masterpieces. ;)
Have you tried any different crafts or activities lately?
We made a twine road:
Share your ideas. ;)
Wednesday, May 2, 2012
Preschooling
A friend of mine recently posted that her son was loving the workbooks I helped her pick out, and it inspired me to write a blog post.
Being a teacher at heart, I feel that it is my duty to make sure that my children are well educated. I started preschooling my son at home when he was almost 3. I had been teaching second grade, and I was about to become a stay at home mom for the first time. I was worried I would go crazy with all that time on my hands, and I also wanted to feel productive; I wanted to feel as if I was teaching someone something.
By this time, my son knew all of his colors, he could say his ABCs, knew plenty of shapes, and also knew information such as all of our full names, my phone number (w/o area code), and what state we lived in and used to live in. He was counting to 20 alone and 100 with assistance (for 30, 40, 50, etc.). He could also count backwards from 10 and understood one-to-one correspondence (i.e. counting physical objects correctly).
Here were my educational goals for him when I began:
1. I wanted him to identify all of the capital letters and develop some fine motor skills by working with a pencil to trace them.
2. Identify numbers 1-10
3. Identify lower case letters
4. Learn each sound of each letter, and identify beginning sounds in words
While working through these goals, we also worked on all sorts of information, like prepositions, people/jobs in the community, weather, life cycles, etc.
We have gone through a ton of work books during our journey. Sure, there are more cost effective ways, but I really didn't have the time for that (#2 was on the way). I did print pages off the internet and make pages of my own, but I also could have gotten protective plastic sleeves to put pages in to make them resuable (write on the sleeve with a dry erase marker).
The first workbook we started with was the Mead Preschool Workbook. I can't say enough good things about Mead. I really like the material in these workbooks. There are different "chapters" for letters, numbers, social studies, etc. While using this book, I also began teaching my son to recognize capital letters. I bought foam circles and a bag of foam letter stickers from Walmart. We learned 2-3 letters a day. We worked through the page in the work book, and then on a sheet of construction paper, I wrote the letter again and had my son trace it several times. Then, I drew 4 pictures of words that started with that letter. I explained the sounds and he circled the beginning letter of each word. Then, I gave him a handful of letters and let him choose all of the As, Bs, etc. He loved peeling the sticky off the back and sticking the letter to the circle. Each letter had its own circle.
Here is our current stack of materials:
We have gone through twice this many. I put some of his favorite pages on the fridge and throw the books away when we're done. My son LOVES working through his school books, but many children prefer hands-on activities. Shape and color walks, and letter hunts are a lot of fun. Just go outside and walk around. Look for shapes in ordinary objects. Do the same with colors. Now, my son loves the alphabet game in the car (i.e. finding words that start with A, B, C, etc. in order). We work as a team to finish.
(I don't know why this picture is sideways, but I don't know how to fix it!) I try to keep things fun for him by also getting workbooks that are more exciting. They are pretty cheap, so it's worth the money. The Dollar Tree has a lot of character themed workbooks for writing and math practice. That's where we got the Spiderman ones. The Hidden Pictures book is from Amazon. I like to order fun books there also. He really enjoys this book, and books with mazes, connecting the dots, etc. He has fun and is learning at the same time. The mazes help with their hand control and fine motor skills; connecting the dots helps with number recognition and counting.
We finished these two books today. I loved them so much that when we were only a few pages in to them I went ahead and ordered the Kindergarten levels. Walmart carries a lot of Mead books, but I had to get mine from Amazon (got to love their free shipping when you spend $25.) I got his fun super heroes folder to keep loose sheets in.
At this age, it's my opinion that learning to read and write is very important. It's also important to teach them about the world around them, especially when it's something they're interested in. My son loves dinosaurs, so we have learned the names of many, and he has learned the difference between carnivores, herbivores, and omnivores. He can even identify what some dinosaurs ate by their teeth. It can be tricky though. ;) Anyhow, the flash cards are from Target's $1 aisle. There are lots of cheap goodies there! The two books are from the Dollar Tree. They ended up being over his head, but for $2, who cares. We can use them more later.
Here is our current workload! FYI, my son is only 4 years old. He's reading first grade sight words and we are working on a Kindergarten level. He now identifies and writes all of his letters, understand phonics, can spell words when I sound them out and can sound simple words out (and read them). He can write his 11-letter name, knows our entire address, and my phone number (including area code). He knows addition to sums of 18, recognizes numbers to 100 (with help sometimes), and reads bar charts.
I definitely recommend these Mead books to start learning with your little one today. :) There are tips on almost every page for extending the activity. It's important for little ones to see that what they're learning applies to and is useful in their daily life. Also, most of the tips are hands-on, fun activities!
Please share your thoughts! Do you have activities that you've done with your little one that were very effective? Do you have advice for people working with children who are not interested and do not want to sit still? I'd love to hear it. =D
Subscribe to:
Posts (Atom)
My New Favorite Muffins
Because of food allergies, we are dairy and egg free. The safest egg replacement options for us are banana and applesauce. So usually our m...
-
If you didn't read the first post... Last week I achieved over 3,000 fans on my Facebook page and over 10,000 views on my blog! I am so...
-
I have found a lot of joy (aka instant gratification) lately in whipping up some cute little camera buddies. They caught like wildfire on m...
-
I haven't really had time to write up patterns lately. I've been so busy with pre-K, soccer, karate, and dance, while also trying t...